Showing posts with label Frugal Living. Show all posts

Sunday, November 20, 2011

(Faux) Blackened Wax Fruit Tutorial~Thrift Shop Bowl Makeover

 If you read my blog on a regular basis you already know that I'm a thrift shop junkie. I have a favorite local shop run by the sweetest little ladies. They are exceptionally kind to me and always seem to have the "good stuff". Last week I stopped by, and among other things, found this...
...large wooden bowl filled with faux fruit, only $4. This is only a few pieces of the fruit, as I nearly forgot to snap a "before" photo. I had an idea brewing and was impatient excited to get started.

I've always wanted a big ol' bowl of the beautiful blackened wax fruit that I see in shops, but being the cheapskate that I am, have never wanted to spend the money on something "I can make myself". Yes, yes we've all been there, haven't we? We CAN make it...but we almost never do. Well, when I saw this lovely big wooden bowl filled with fruit I got the idea to turn faux fruit into "blacken wax" faux fruit. And if it didn't work...well, the bowl was still a deal at $4, right? And while I was at it, I decided I'd give the bowl a new/old finish.
~Before~
 I already had everything I needed, so I gathered my materials.
 For the faux wax fruit you only need a few things.

Black Acrylic Paint, Matte Finish (the cheap stuff is fine)
Ground Cinnamon  (the cheap stuff is fine here too. I bought ALDI brand)
Small Artist's Paintbrush
Drop Cloth
Handheld Hairdryer (optional, but sure speeds up drying)

This project is so easy...you're gonna love it.

Spread out your drop cloth and give yourself plenty of room to work. If you do a lot of pieces, you'll have fruit drying everywhere. Using full strength paint, begin painting each piece of fruit with a nice even coat. I painted one side of each piece of fruit then sat it aside to dry and did the next piece. Then I went back and painted the other side of each piece. I checked each piece in bright light to be sure I had good coverage. You want the original color of the fruit to be completely covered. 
 Like this.
I didn't paint the stems. Tip: If any of the fruit is missing a stem-or if they look "fake", you can replace them with stems from real fruit. Just poke a small hole in the top using an awl or a large needle and glue in the replacement stem. Do this before adding the cinnamon.  
 Now for the tricky part. OK, not really...there is no tricky part.

After the fruit is completely dry (this is where the hairdryer comes in handy), pour your bottle of cinnamon into a shallow dish. This project only uses up a small amount of cinnamon, but you can keep what's leftover to use on another project. Just don't use it for cooking. Now, roll each piece of fruit in the cinnamon. You can gently pat, rub or sprinkle...whatever works for you. I just rolled mine around, then sat each piece aside while I painted my bowl. 
Now for the bowl...I started by giving my bowl a good washing and allowing it to dry overnight before painting. There was no previous finish on the bowl. For painting the bowl I used Old Century Colors, acrylic paint in the color, Olde Pewter 2023. I used full strength paint to get the look of a heavily painted old bowl...but you can water your paint down (one part paint, two parts water) for a more transparent look. 
 My painted bowl, before the antiquing process.

I painted the bottom of the bowl, going around in a circular motion, with the grain. Pay special attention to the rim and the bottom where you would see natural wear, were it an antique bowl. If you get too much paint on the bowl, just use a wet cloth to scrub some off, again following the bowl's contours. You can also use fine sandpaper to remove a bit of paint. When you're happy with the way it looks, set it aside to dry. Again, I used a hairdryer to speed up the process.

After your bowl is dry you'll want to go over it with an antiquing medium to give it a bit of age. I used Folkart/Plaid Antiquing Medium, in the color Apple Butter Brown, to stain my bowl. Mix one part antiquing medium to two parts water. Remember a little goes a long way. Brush the mixture on over the outside of the bowl and quickly wipe off excess stain with a dry cloth. Then repeat on the inside of the bowl. The antiquing medium drys fast and the longer it sits, the darker the wood will be. If it is too dark for your liking, wipe some stain off with a wet cloth. 
The  bottom of my painted bowl, after a light sanding and applying the antiquing medium.

I antiqued both the inside, and the outside of my bowl. Keep in mind that you won't want to use these products on the inside if you plan to serve food in your bowl, as they are not food-safe. 
 The inside of my finished bowl is a nice warm brown color.


~After~

Looks  and smells just like the real deal...and just in time for my Thanksgiving table!

That's it! Told you it was easy!

Until next time...
Rhonda

Wednesday, February 23, 2011

Hello, my name is Rhonda...

...and I'm a picker. As you saw in my last post, I love treasure hunting. And finding vintage treasure usually involves lots of time spent digging through thrift stores and garage & estate sales.

I bought this transferware, luncheon service for six, from a sweet lady on Craigslist this week. Red "isn't her thing"...fortunately, it's mine.
A few of you asked where I find so much good stuff...I thought I'd share some of my best pickin' tips.

1. Go often. You will have to devote some time to treasure hunting if you want to find the good stuff. You might get lucky on your first trip to Goodwill, but it's unlikely. As Ben Franklin once said, "Diligence is the mother of good luck." The harder I work at finding treasure, the luckier I seem to get. Eventually you will learn which days to stop in which shops, what neighborhoods to shop, and you will even develop an "eye" for the things you like. Speaking of Goodwill...their stores are OK, but personally I love the little church thrift shops. Better pickin', better prices, and the proceeds usually support local mission projects.

2. The early worm gets the yellowware/hutch/firkin/etc. If you aren't a morning person, become one. I am not naturally gifted in this area, but I have been known to be on the doorstep of an estate sale at 5:30am with a cup of coffee and a book. Behave yourself and no one will mind. 

3. Which brings me to...be polite. You don't need to grab, push or be obnoxious to get the goods. I'd rather leave empty handed than engage in rude behavior.

4. Be genuine and friendly. People like to talk and tell their stories...listen and be sincere. Don't try to get one over on people. It's icky and most people can sense it.

5. Don't be squeamish. Sometimes you will have to touch some grimy or unpleasant things...it's inevitable. Take along some hand wipes or carry a pair of work gloves with you.

6. Utilize the local newspapers for sales information.  I like to get the newspapers and plan my garage sale route based on time, what is offered and location. Also note the time sales begin and end.  Please respect people who say "no early birds"...they have probably been working for days to get ready for the sale and would like to sleep until 7 am.  

I found these 1958 princess phone key-chains in a tattered old box at a garage sale last summer. They were under a table where some of the less desirable items had been stowed. I had no idea what they were at the time...but when something is so darn cute, how could I go wrong? Let's just say I made a profit. My point? Look closely and look everywhere.

7. Utilize online sites like Craigslist.org, freecycle.org and estatesales.net. Subscribe to these sites and have notifications sent straight to your inbox. Get to know the estate liquidators...which companies have good prices, who does a great job...which companies should you avoid? Whether buying or selling, please keep folks abreast of your intentions...and for heaven's sake, respond to emails. If you make an appointment, please, keep it! I am stunned at the number of people who are no shows on Freecycle. They are being GIVEN something and can't be bothered to show up? Always be safe when making contact with someone you don't know. Meet in a public place or take someone with you...they can even wait in the car, but never go alone. I always let sellers know I have someone with me and that I will need to find an ATM to get cash. If something seems off, it probably is...leave immediately.

I just love the old calico, ringers and stenciled porcelains and have been trying to collect enough of these buttons to make a sampler. Thanks to a sweet Craigslist seller this week, I'm ready to begin. 

8. Talk to people...especially people who you are already buying something from. Tell them what you collect. Ask questions. They might have what you need...but you'll never know if you don't ask. Never be pushy or pressure someone to sell something they aren't ready to sell. If you're pleasant, they'll remember you when they are ready.

A friend of a friend called me when she was ready to sell her mother's button collection. She had heard that I like old buttons. I bought 800 of the loveliest buttons I've ever seen from her...and we both went away happy.

9. Be prepared. Fill up your gas tank the night before your pick. Fold down or take out seats in your vehicle if you need to. Make sure your cell phone is fully charged. Have a GPS or map of the area you're going to. Get up early and dress for success...wear comfy clothes & shoes.  Make a list with dimensions of things you are looking for and bring along a tape measure. Take a snack and plenty of coffee along. Know where the clean bathrooms are. Pack hand wipes.  Head out with a smile and be nice.

10. Be patient and enjoy yourself. Half the thrill is in the hunt. Cross you fingers and rub your rabbit's foot. Today may be your lucky day!

Happy hunting! Until next time...

Tuesday, February 22, 2011

~Tuesday Display Chain~ Bowls

Each Tuesday Misi, of Gable House Musings, chooses a theme and invites bloggers to play along with her "Tuesday Display Chain". This week we are showing off "bowls". 
I am a collector of bowls...big bowls, little bowls...bowls made of pottery, pewter, wood, china, glass...I love them all.  These are a few of my favorites...

~This tiny yellowware bowl was a garage sale find...just .25 cents. Isn't that great? OK, so here's the not so great part...see the spice box it's sitting on? Also a garage sale find...it was $10 and had the original finish-including stenciled drawer fronts. I thought it was ugly, and not that old...so I gave it a prim finish. Can you say young and stupid? Saw one just like it (before condition) in an antique shop for $150. *sigh* OK, moving on...~

~More garage sale bowls. Are you sensing a theme? My entire house is decorated in early garage sale.~
~I found this set of nesting yellowware bowls at the thrift store, four of them for $20. The two largest ones are pictured here on my $1 corner thingy. I think it might actually be a plant stand, but it works for me.~
~Red hutch full of primitive goodness~
~You guessed it...garage sale. Hutch, $50. Loading it into a minivan by myself, priceless.~

~Rowe pottery bunny, and a piece from my Dad's baby dishes, surround a wooden bowl filled with gourd eggs.~
~A redware bowl from Turtlecreek Pottery, a favorite gift from my Mother in love.~

~Wooden bowls rest on a dry sink.~

~A HUGE yellowware bowl from my grandmother. It measures 14" in diameter and makes a fabulous punch bowl.~

~An old trencher takes center stage in the buttery. The woman I bought it from said it was hand carved by her great-grandfather. I know...how could she sell it?~

~Vintage Pyrex, colorful and fun. And no, this photo isn't staged. I bake outdoors all the time.~

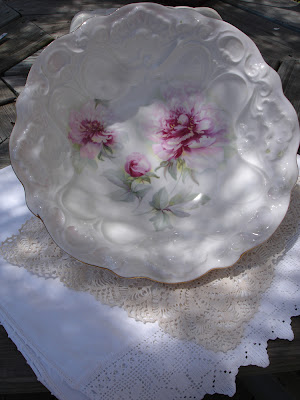
Not my style, but still...one of the prettiest bowls I've seen. 

It seems to me that one can never have too many bowls.
See the other Tuesday Display Chain participants at: http://1890gablehousemusings.blogspot.com/

Until next time...